Tuesday, December 25, 2012

Merry Christmas


Wishing you and yours a very Merry Christmas and a Happy New Year!

The Orr Family- David, Laura and Berkley

Tuesday, December 11, 2012

Rustic Glam Christmas Tree

Yes- that is the same name I gave my tree last year... and the tree looks very similar to last year's tree. If I had it my way (and an endless holiday bank account), I would change up Christmas decor every year. My husband, on the other hand, thinks that idea is ridiculous! So I am using much of what I had last year but tweaking it just a bit! So without further ado- here is our 2012 Rustic Glam Christmas Tree!


I used my "fabric feathers" that I just loved on last year's tree and layered in silver, gold and burlap ribbons.  I stuck with my gold, silver, mercury glass and rustic ornaments although I did surprise myself with a few new ornaments that I forgot I bought after Christmas last year!


I also set up our advent calendar on time this year and we have enjoyed counting down to Christmas!

In the middle of the chaos of trying to pack and move, the glow of the Christmas tree makes the house still feel festive- just ignore the all the boxes!! It just wouldn't be Christmas without the tree and I couldn't stand the thought of not setting it up!


 If you're curious, here is a photo of our 2011 Rustic Glam tree:

I'm linking up with Honey We're Home and Thrifty Decor Chick for their Christmas Tree Parties!


Sunday, December 9, 2012

{Handmade Gifts} Aromatherapy Eye Pillow

Hi Everyone!! Today I have teamed up with a great group of ladies to create handmade gifts with something for all ages! If you need an idea for a few more gifts under the tree, check out these sweet handmade ideas from the ladies listed below!

Photobucket


These past few months have been a little stressful for my mom. Some changes at home and at work have given her a few rough days here and there. I figured what could be a better Christmas gift than some relaxation. An aromatherapy eye pillow is an easy gift to make that will pair well with a glass of wine to help her relax after a long day.

Eye pillows are filled with flax seeds and a few drops of lavender oil and are supposed to help headaches and work as an antidepressant. The pillow has the perfect weight to put enough pressure on your face to contour to it, blocking out the light.


To create the pillow, I used:
      -  Two 9" x 3" pieces of fabric scraps
      -  Sewing Machine and Thread
      -  Scissors
      -  Flax Seeds
      -  Lavender Oil

First, I sewed the two scraps of fabric together (pretty sides facing each other) on three sides, leaving one of the small sides open. And then turned the pillow right side out.

Next I mixed the flax seed and lavender oil. I straight guessed on amounts here. I filled the bowl with flax seed and then sprinkled the lavender oil until it smelled good. (Sorry I can't be more specific than that!!)

I then stirred and spooned the flax seeds into the pillow and sewed the last end closed. It may not be the prettiest gift under the tree but it sure does smell good!

Handmade gifts are my favorite to give and to receive!! Does anyone have some great handmade gift ideas?

Friday, December 7, 2012

DIY Art Inspired by Lulie Wallace


Over the past couple of years, I have started a collection of canvases with every intention of making a beautiful piece of art for our home. I started one project over two years ago that involved six square canvases but half way through, changed my mind on the direction I wanted to go with art. So, in the meantime, I have six lonely white canvases that have been hanging out in my junk room.


I have pinned so many beautiful art pieces and Lulie Wallace's gorgeous flower arrangement paintings kept standing out to me. I decided to try my hand at a painting inspired by her work. 

What I love so much about Lulie Wallace's paintings is they look so effortless. They have a "sketch-like" feel to the painting that I thought would be simple to try and imitate. I fell in to the paint-inside-the lines-perfectly-trap and my painting started to look more like "paint by numbers" rather than the sketch-like I loved. This project definitely made me appreciate  the talent it takes to create a beautiful work of art.

I went back over with metallic gold, silver and green paints to help give a more sketchy feel. I think it helped a little bit in that department but I also love how the light bounces off all those metallic accents. I love the art work I created but one day maybe I can own a real Lulie Wallace painting.


Has anyone ever dabbled in creating you own work of art? After this, I have realized my dreams of a large abstract DIY painting maybe be harder than I originally thought!

Thursday, December 6, 2012

Simple Fresh Wreaths

In phase 2 or 3 of trying to decorate our mantel earlier this week, I came across four embroidery hoops I had stashed in our junk room and thought they would make great little wreaths. Seconds later, I was out in our yard (with a flash light) clipping greenery off a few bushes we had around our house.


I created four of these simple fresh wreaths all within twenty minutes- seriously easy with the exception of a few hot glue burns.  Although they didn't work for my mantel, I found a new home for them hanging in front of the window behind our Christmas tree.

I put a line of hot glue around the edge of the hoop and then clipped small sections of the greenery to wrap around until the front of each loop was covered. Then I hung each hoop with some leftover silver and gold ribbon I had in my Christmas stash.

I'm glad I was able to find another home for these cute little things. They may not last all season but there is  plenty more greenery where that came from out in the yard!

I'm linking up with Centsational Girl for her Christmas Craft link party and The Nester for the Best Christmas DIY and Crafts Ever Party! Head over and check out all the great inspiration for decking your halls this season!

Wednesday, December 5, 2012

Metallic Mantel

Sparkle, shiny metallics and candlelight- our mantel this year is full of all three. By using what we had in our Christmas decor collection, I lined our mantel with candle sticks and votive candles mixed with shiny ornaments and our faux zinc "Peace" letters.

The confetti painted vases look great paired with the mercury glass votives and other metal candle holders.  I filled the large glass pillar candle holders with silver beaded garland and used white candles throughout.


I used a frilly white frame I had and dangled a few extra ornaments to add height to the middle of the mantel.

This is like plan "d" for the mantel this year. I tried a few different ideas and finally settled on this layout (for now). Who knows what might change before Christmas!

Just in case you were wondering- here is my mantel from 2011.

I'm linking up with The Lettered Cottage and Ten June for their mantel parties!

Monday, December 3, 2012

Confetti Painted Vases

I am trying to use most of what I already have for Christmas decor this year. It just doesn't make sense to go out and buy all new but, then again, I like to change it up just a bit! Last year I used lots of silvers, golds and a few rustic elements and I plan on doing the same this year. For a simple holiday craft, I created confetti painted vases using craft paint and plain clear vases I already had at home.

I pinned a colorful version of these vases a while back and knew that a simple metallic version would mix in great with my holiday decor.

I started with these clear Libby vases that I had left over from our wedding.(I used this trick to get out all the melted candle wax!) I had planned on confetti-ing all 7 vases that I had on hand, then decided maybe 5 would look better, then I started working and realized how much time each one took and decided 3 would be great!

I used two colors of gold and one champagne craft paint. To create the dots, I dipped the wooden end of a paint brush in to the paint and then dotted the vase. The more paint on the end of the brush creates a larger dot.


I started with the darkest color, then added the middle shade, and then the lightest color on top.  In between colors, I used a hair dryer to quickly dry the dots. Also, if some of the dots got too thick, I dried them just enough before spinning the vase to keep the dot from running.

The directions then say to place in a cold oven, preheat to 350 degrees, bake for 30 minutes and then turn off the oven and cool completely while the glasses are still in.  I kind of skipped this step but I'm sure I'll get around to it eventually!!

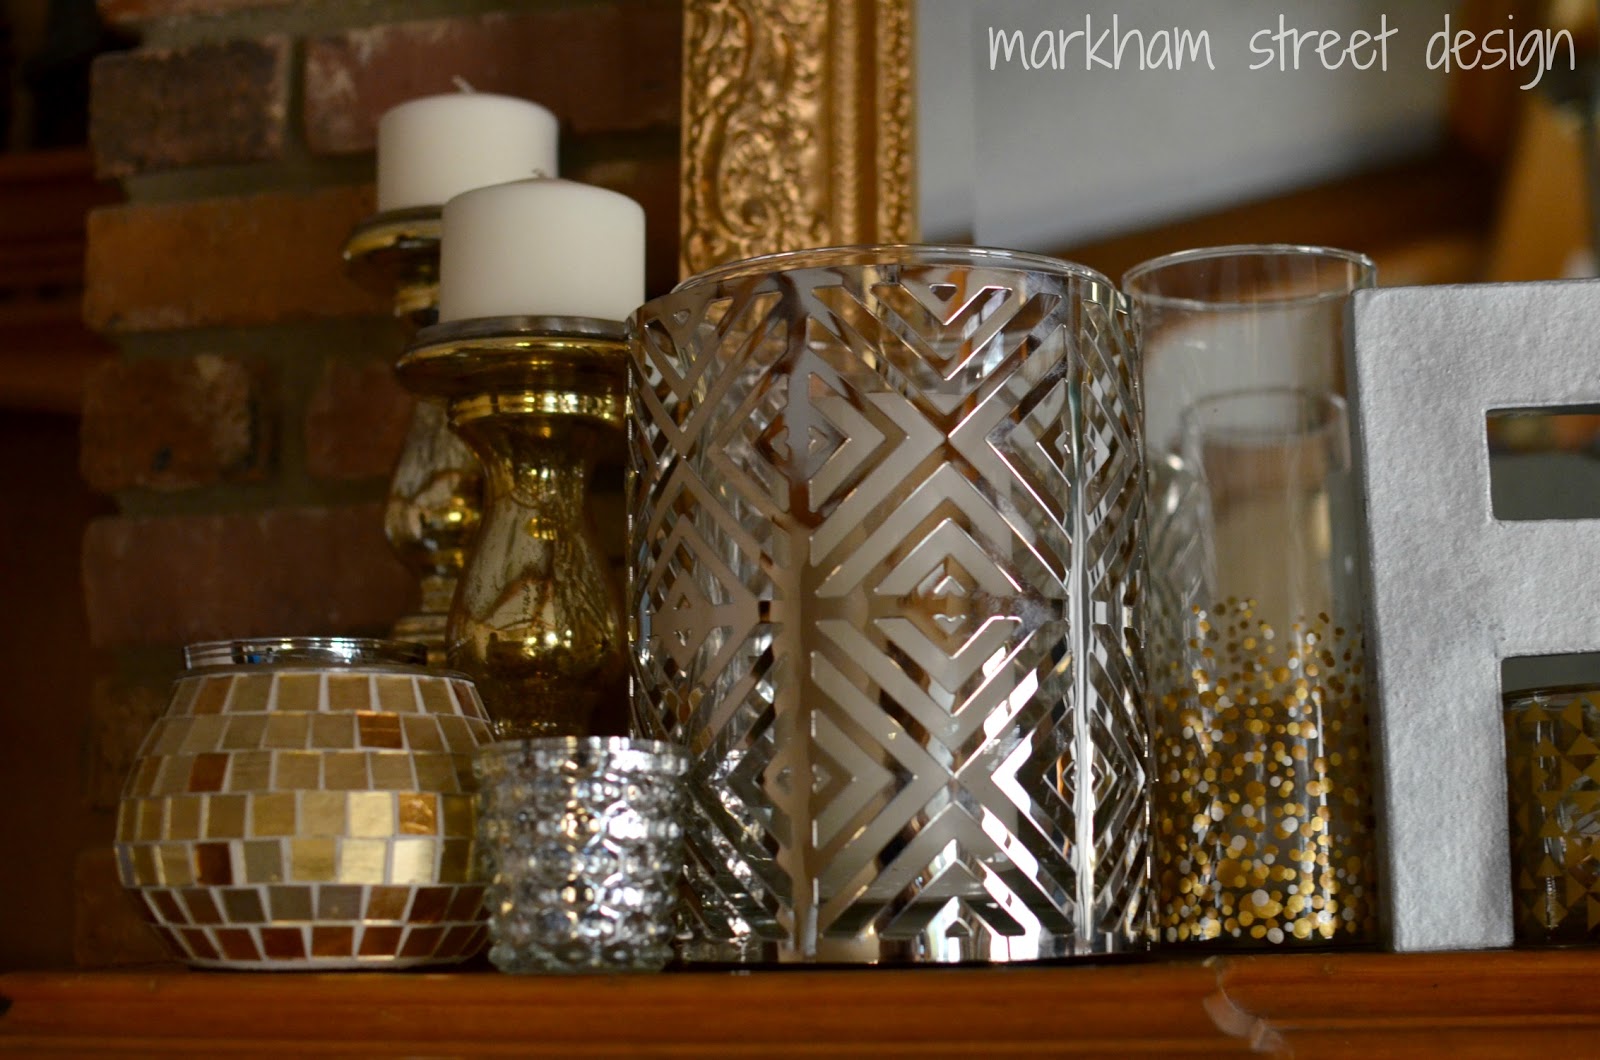
My plan for the mantel was to cluster many metallic candles together but I am running a few short since I only decided to create three confetti vases. I have a little tweaking to do to the mantel but I'll come up with something!

These are pretty with a little candle in them but will also look great with flowers for non-christmas-y occasions!

I can't believe it is Christmas time already! It seems like this year has flown by- but I'm taking in every little moment this last month here at home!

I'm linking up with Hi Sugarplum on Tuesday and also The Nester for the Best Christmas DIY and Crafts Ever Party! Come check out all the great crafts!!

Tuesday, November 27, 2012

Chevron Painted Kitchen Mat

This project has been on my to-do list for a long time! I spotted this Ziggy Mat in the June/July issue of HGTV Magazine but I couldn't dish out $40 on a kitchen mat. I decided to take the not-so-cute foam kitchen mat that I already had and paint it to look like the Ziggy.

I planned for this project to be one of my first in my 31 Days Project and then tried to hurry and finish in time for the latest Pinterest Challenge- which neither happened in time. Now, it has sat finished for a couple of weeks before I got around to blogging about it!

To start, I took the kitchen mat we already had and added a layer of primer.


By looking at my inspiration and guestimating how wide each stripe was, I marked each line and then taped off every other one.

I then marked off each of the diagonal lines every three inches or so.

I used craft acrylic paints from Hobby Lobby in many colors. I started to match the colors to that of the original mat but ended up choosing some that I liked more.

The tape kept my vertical lines crisp and straight, but to avoid the time of taping off every other diagonal section, I free-handed those edges.


After peeling up the tape, I connected the diagonal lines to create the chevron pattern.

I taped off the edges again and then started painting the second set of stripes. I had a few touch ups to make at the end but overall the Frog Tape worked well! To finish, I added a couple of thin coats of wipe-on poly. This just protects the craft paint from any spill or dirt that may get on the mat. I have had a few spills and drips to clean up and I am happy to report they wiped off easily with a damp paper towel!


This mat adds a great pop of color to my otherwise tan kitchen! I absolutely love it!! It took quite a bit of time but I'm so glad I did it! Using the mat and paints I already had at home, I would say this mat is a steal of a deal compared to the $40 competitor!!

Friday, November 9, 2012

{Date Night} October

Continuing on through our date basket, David and I went on our October date a couple of weeks ago.  Our city's parks department hosts Movies in the Park and plays favorite movies each Thursday night in April and October. This year we decided to go to the annual Halloween showing of our hometown thriller- The Town That Dreaded Sundown.

In the envelope I included the info sheet describing the date and some of our favorite candies to snack on.

The Town That Dreaded Sundown is a movie loosely based on a true story about unsolved murder mystery cases in the Texarkana area- including Spring Lake Park- back in 1946. The "Phantom Killer" murdered five people over the course of a couple of months and had the town of Texarkana in fear of who would be lurking around outside after the sun went down. The Phantom Killer was never identified and could still be out there today!! buhahaha.....


It was my first time to see the movie. I was a little scared-y cat and thought the idea of watching this movie in the same park where some of the murders occurred was just a little too much for me! But it wasn't as scary as I first thought. 
sorry for the grainy iphone photo!
The annual showing is a big event and there was a great turnout this year. We sat out our lawn chairs, bundled up and enjoyed the movie.


To anyone thinking of creating a Date Basket- David and I have really enjoyed our dates! We are kind of sad that we only have two more left but hope that we can keep the dates up even after we move to Africa!! Has anyone come up with any fun dates of your own? I would love to hear!!
Related Posts Plugin for WordPress, Blogger...
09 10 11 12
Blogging tips