

2. This blinging beauty is from Meredith Heard at Welcome to Heardmont. I love how she used barbecue skewers (which are cheap and that's great!) and the metallic spray paint! I love some bling bling!
3. The last inspiration photo came from Isabella & Max Rooms. The twigs are similar to the skewers that Meredith used but seems to be a bit more random with the different lengths of the twigs used around the mirror.
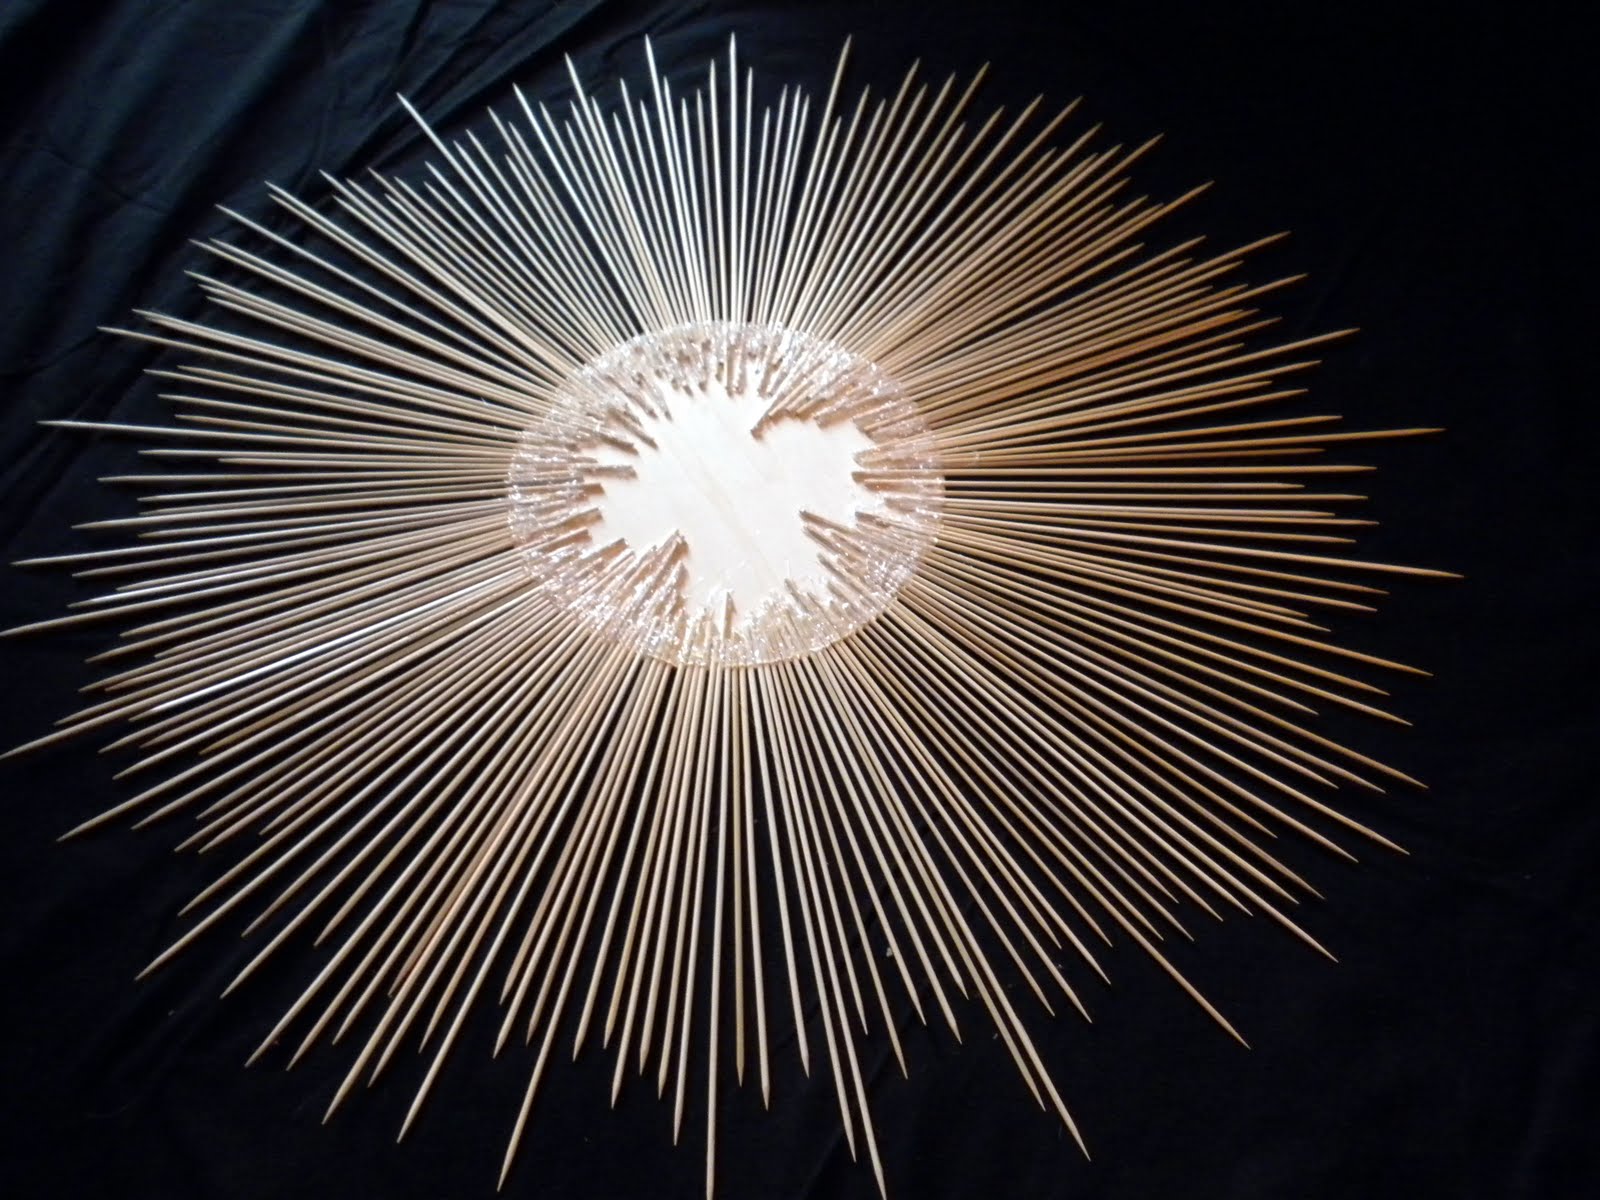
So on to my Sunburst Mirror.

1- 10" embroidery hoop
1- 10" round mirror
2 sizes of skewers (10" and 12")
Template from Stephanie at Under the Table and Dreaming (another great DIY Sunburst Mirror)
1- 10" wooden disc
hot glue (lots and lots of hot glue)
I started by placing my template down on my round disc and marking little lines around the circle. Then I placed and hot glued a skewer on each line a random heights. I then filled in the sections randomly (I didn't want to have to think too much and I liked the random pattern).

 | |
| Holy Hot Glue! |

The embroidery hoop had a few ugly spots that stood out much more after I spraypainted it. I decided to outline the hoop in a string of costume jewelry pearls that I also spraypainted.


And Voila!


I love my mirror! Thanks Meredith, Danielle, Stephanie and Janell for all of the inspiration!
 |
| Young House Love |
 |
| Pin-Head Project Party Bower Power |

 Vintage Revivals: Krylon Glitter Blast Link Party
Lemon Tree Creations Pinterest Party
I love how your mirror turned out Laura! Thanks so much for linking to my mirror. Can't wait to see how yours looks once it's up! :)
ReplyDeleteMeredith @ Welcome to Heardmont
That is really neat...I like how you added the string of pearls to give it a bit of embellishment. Good job:)
ReplyDeleteSo very awesome! Nice work, I love it. Definitely pinning this for future reference. :-)
ReplyDeleteAwesome job.
ReplyDeleteOh wow, I love it. The beads around the edge are really glamorous. I just made a similar mirror, but I didn't know what to put around the mirror to make it look finished, but now I have an idea!
ReplyDeleteThat came out great! I'm really inspired.
ReplyDeleteLove it!
ReplyDeleteThis is beautiful and your idea rocks.
ReplyDeleteIt is awesome!!!! I am definitely doing this :-)
ReplyDeleteoh cute I Love the silver!
ReplyDeleteAmazing job. Really looks perfect!
ReplyDeleteLove it! Goes perfectly with those lamps.
ReplyDeleteThe string of beads gives it that extra pop! Love it.
ReplyDeleteI never would have thought of doing this. Great job!!
ReplyDeleteI love this mirror and would very much like to make one. Im new to crafts so please forgive my ignorance .You glued the skewers to the wood first. Where do you obtain this round circle. Also, at what point did you place the mirror on? After spraypainting? Did you hot glue that as well?
ReplyDeleteLori- I bought the round wooden disc at Hobby Lobby in their unpainted wooden craft area. I think it was a $1. I made sure the size of the wooden disc was the same as the round mirror that I also bought at Hobby Lobby. I hot glued the skewers in place around the wooden disc. Once that was dry I spray painted the wooden disc with the skewers along with the embroidery hoop (separately). Once the paint was dry, I put the mirror in place in the hoop and hot glued around the edges. Then I attached the mirror with the hoop around it to the wooden disc with skewers using gorilla glue (I believe). I hope this helps. Let me know if you have any questions!
ReplyDeleteI love it! I bought an embroidery hoop randomly and this is the perfect project for it! I ordered a 12" round mirror as well as string pearls but I was curious what you'd recommend for a backing since i don't have a wooden disk. Maybe cardboard?
ReplyDeleteThat might work although it does get pretty heavy with all the wooden skewers hot glued on. Just make sure it is a sturdy cardboard.
Delete