Wednesday, March 14, 2012

Pinterest Challenge- Ruffled Lampshade

Yay! Another project has been crossed off of my to-list and moved from my DIY Pinterest Board to my DONE! Board!! Today I am linking up with the Winter Pinterest Challenge hosted by Young House Love, Bower Power, The Great Indoors and Hi Sugarplum.

I have been wanting to liven up our bedside lamps in our master bedroom for a while now. I fell in love with a couple of ideas but none seemed to work out.
BEFORE
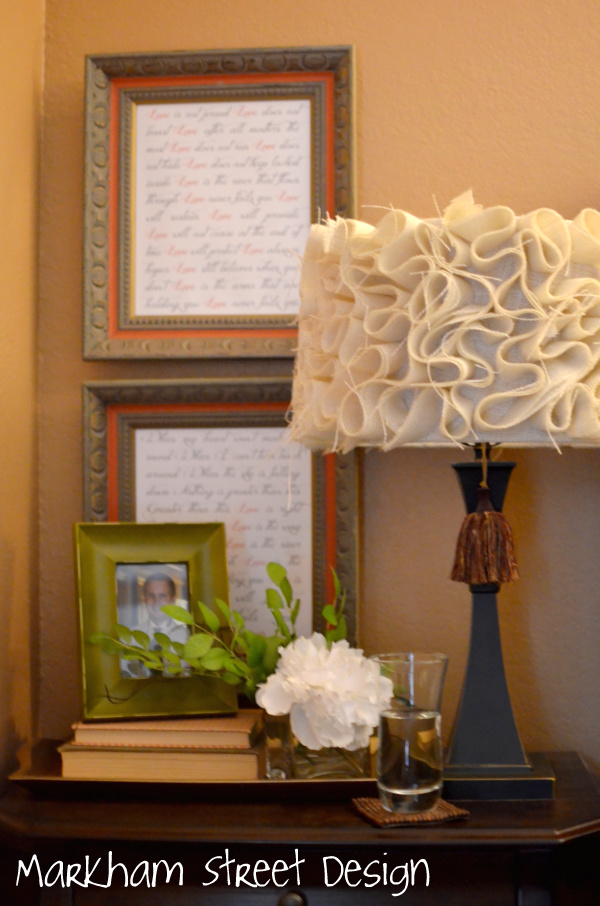
This ruffled burlap lamp shade caught my eye just a couple of weeks ago and I knew it would be the perfect project for this challenge.
Tatertots & Jello
Terra, from Mama Says Sew, gave a great tutorial on Tatertots &Jello that was easy to follow and I was able to complete it mostly in one night (had I not had to make a run to Hobby Lobby for some more burlap!)

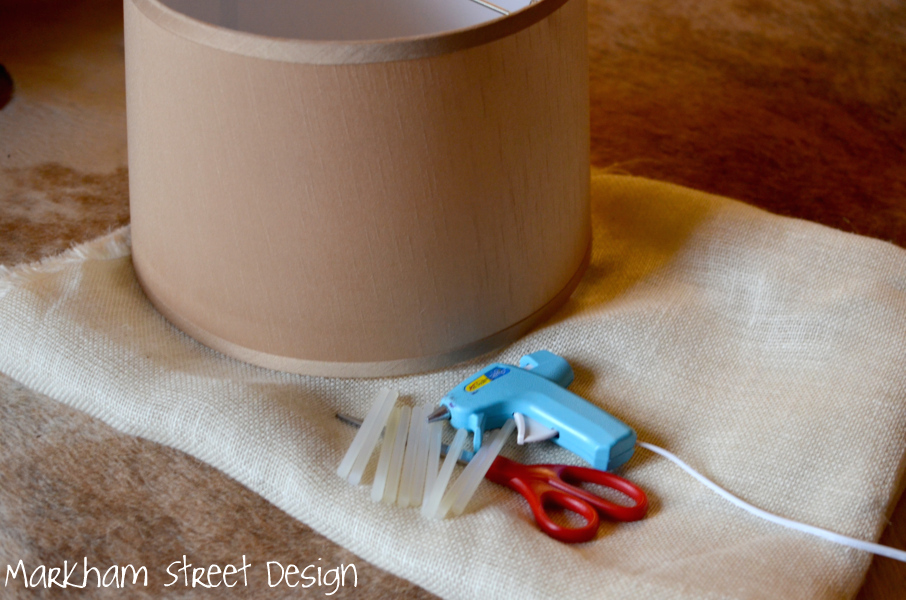
I had everything on hand for this project. I started with my old lampshade, 1.5 yards of burlap (I really needed about 2 yards), glue gun and glue sticks and a pair of scissors.

I started by wrapping my lamp shade in burlap. It is by no means perfectly wrapped- I should have given myself a little more wiggle room on the top, bottom and sides but it all gets covered up in the end so it didn't really matter.

I cut four inch strips of the remaining burlap and ironed them in half making two inch wide double strips.

Then I placed a inch or two of hot glue on the folded edge of the strip and glued it to the lampshade in a squiggle pattern.
I continued doing this with every strip (making sure each ruffle was a little different) all the way around the lampshade... until I ran out of burlap!!
This is where I had to make a run to Hobby Lobby. I think I might have ruffled a little tighter than my inspiration lampshade did meaning I used more of my fabric quicker. I used about four more strips, close to a half yard more, to finish it!

I started to worry that with the four extra inches added around the shade that it would somewhat dwarf my lamp but I love how the shade stands out!

It is so pretty and I love it both with the lamp off and on!!

I realize this has been done by quite a few bloggers in the past but it is new to me and I couldn't be happier with the new addition to our bedroom! I'm am starting another Anthropologie inspired lampshade project soon- be sure to stop back by and see how it turns out!!

Check out all the other Pinterest Challenge projects at Young House Love, Bower Power, The Great Indoors and Hi Sugarplum.

Monday, March 12, 2012

{Mood Board Monday} Etsy Artwork

I am so excited to participate in my first Mood Board Monday link party with Sarah at Pewter+Sage.  I haven't created a mood board since college (and I am still a little new to making it on the computer) but I had a lot of fun creating this room for a pretend client with no budget!!

Sarah's challenge is to create a room around one of three unique pieces of art from creative Etsy artists. I choose to work with Carl Christensen's photo "Romance of Fall".
via
Isn't it beautiful?! I chose this piece of art because of the rustic feel with the trees and the beautiful colors of the autumn leaves.

For this board, I set out to create a rustic yet beautiful space with a modern color scheme. My color scheme was pulled directly from the photo- the yellow of the leaves, the gray of the sidewalk and the white wooden fence.  I also incorporated many rustic elements to bring the "nature" in.
I'm still learning when it comes to mood boards but I enjoyed putting this one together! Make sure you hop over to Sarah's blog and check out the other mood boards. They are all gorgeous! 

Pin It

Tuesday, February 28, 2012

{Date Night} February

David and I finally had our February date night from his date basket! We would schedule it for one night and then something would come up and we would have to bump it back. But, this past Friday night we broke out our tent and camped out at home!
In the envelope I included an info sheet describing the date, a movie, a "tin foil" dinner recipe, Hershey's chocolate bar for s'mores and a deck of cards for maybe a fireside game!

Before David made it home from work I set our tent up in the living room. It was quite a bit bigger than I thought and ended up having to push all the furniture up against the back wall. (Remind me next time that camping is meant to happen outside!!)
 

I'm not much of a cook and you won't find too many recipes shared here on my blog but this one was too easy and too good not to share!! I found the recipe for Foil Wrapped Chicken on Pinterest and had all (well most) the ingredients on hand. The measurements that I am using is just for one packet- just multiply that by how many packets you want to make!

To start, place a 6 oz chicken breast on a square of heavy duty foil sprayed with oil. My foil wasn't so heavy duty so I just doubled up. I also seasoned the chicken (which the recipe doesn't call for) with salt, pepper, and Rudy's Turkey Rub. The recipe did call for a Chicken Stuffing mix to be added below the chicken but I didn't have any here at home. So I left it out!

Top with 1 cup of broccoli florets.  I tried to measure but ended up eye-ing it!  I used frozen and I think I should have thawed them out a bit more or used fresh! It still worked (and tasted great) but I think the extra "water" made my sauce a little runnier than it was supposed to be!

Top the broccoli with 1/4 cup of shredded cheddar cheese, 1 slice of cooked and crumpled bacon, and 1 tablespoon of Ranch dressing (I eyed it again).

I topped this with another sheet of foil and wrapped it up on the ends, leaving room for heat circulation inside, and then place both packs in a 9x13 pan and cooked at 400 degrees for 25-30 minutes.

After taking it out of the oven, I let it sit for about 5 minutes and then cut sits in foil for steam before I opened it all of the way. I placed the chicken on a bed of rice and then drizzled a little of the "too runny" sauce on top!! Absolutely delicious!!
Super simple and no clean up! It doesn't get better than that!!

For dessert we roasted s'mores over our "campfire"!

Looking forward to next month's date! Be sure to check out all of our dates here!

Thursday, February 23, 2012

Love Never Fails Word Art

I am back at a little DIY-ing this week while trying to finish up some projects in my master bedroom. My first project was more "word art". I know.... more word art! There is something about having sentimental or inspiring quotes or lyrics around your house to inspire or remind you of a special day that keep me making more (plus it is inexpensive)!

These words are the lyrics to the song we had sung at our wedding- "Love Never Fails" by Brandon Heath. It is a beautiful song!

I started with these frames that I picked up at my local thrift shop. I paid only $6.00 for each one and knew from the start what I wanted to do with them (just took me about 6 months to get around to it).

I loved all of the detail and color in the frames. The gold ties in well with a few of the other gold accents in my bedroom and the coral color (although it is reading as red in these pictures) look great with my coral euro shams.

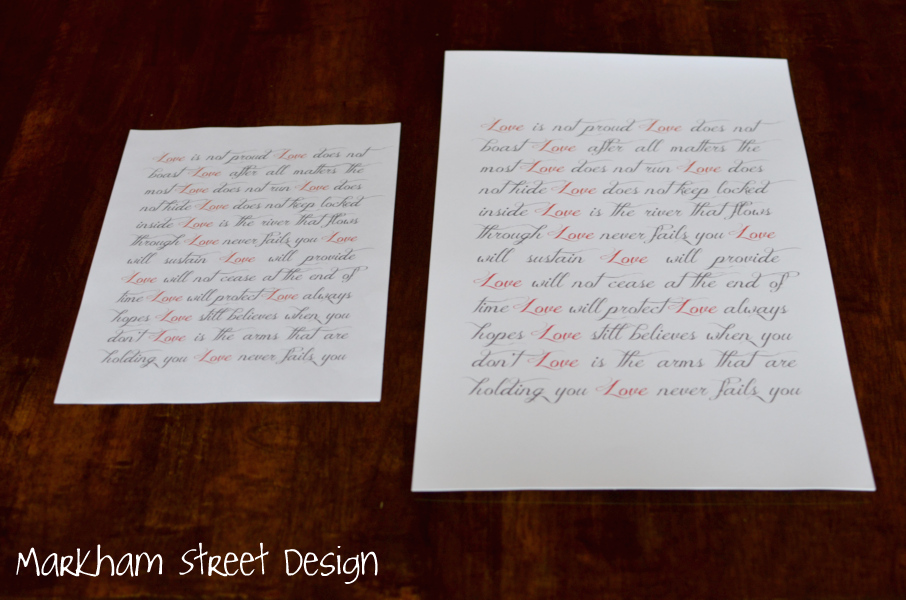
I typed up the lyrics again in Microsoft Word and chose a pretty font on my computer. I chose a charcoal gray as the font color and then made the word "love" coral to match the colors in the frame. I then had my 8.5" x 11" sheet enlarged at a print shop in town to fit the size of the opening in the frame.- this cost me only about $1 per page!


Since it was an odd size, it was printed on an 11" x 17" paper. I trimmed off the extra paper to make it the size I needed to fit in the frame.

I then popped the art in the frame and smiled because I finally finished this simple project!

Such a great reminder of the best day of our lives! They are hanging over my nightstand for now! As soon as I finish up a few more projects, I'll reveal the room I have been working on for months! haha!

What is your favorite way to remember great quotes or lyrics? Do you have them all over your house like me? I am planning some actual "art" pieces soon!!


Linking Up with 320*Sycamore- Under $10 and Under 10 Minutes

Monday, February 20, 2012

{Wedding} Say Yes to the Dress

This past Friday we took a girls trip in search of the perfect wedding dress for my beautiful sister!! My sister, my mom, her mother-in-law-to-be, and I all hopped in the car and headed to Brinkley, Arkansas- home of the famous (at least around here) Low's Bridal Shop.
Low's Bridal

Everyone around here has heard of Low's Bridal. It is the place to go for a wedding dress and was voted The Knot's Best of Weddings 2012! We made the trip a couple of years ago to look for my wedding dress and were so pleased with our experience we knew we had to come back for Emily's dress.
Me. Emily. Mom

Low's is a historic 35,000-square-foot building filled to the brim with wedding gowns. Owner Dorcas Prince's mother first opened the shop over a pharmacy more than 30 years ago, and the Low family has been catering to brides from Arkansas and beyond since. The building once was the Rusher Hotel, listed in the national register, near the train tracks in the center of this small town half-way between Little Rock and Memphis. The architecture and finishes are absolutely beautiful!!
Low's Bridal
There are dresses everywhere you look in this huge store!
Low's Bridal

Low's Bridal
And I am happy to say that she found her perfect dress!! It is absolutely beautiful on her!!
Emily and her dress

Danette.Emily.Mom

Yay!!
Related Posts Plugin for WordPress, Blogger...
09 10 11 12
Blogging tips