Showing posts with label DIY. Show all posts

Wednesday, August 20, 2014

Client Reveal: DIY Nursery E-Design

Nurseries have to be one of my favorite spaces to design. Whether they are bright and bold, or neutral and soothing, I love creating a space for a sweet baby and their parents to enjoy.  Heck, I'm having a ball designing one for my little one now and can't wait to share it with you!

While I was away in South Africa, one of my good friends had a precious little girl and I was thrilled when she asked if I would help design her nursery! The nursery would include many DIY projects, fun girly fabrics, and pops of bright colors. We played with a few fabric combinations and colors but, in the end, narrowed it down to this pretty little design.


This room is all about the fabrics and DIY projects. The fun combination of floral and geometric with pops of bright color look great on baby girl's bedding that my friend made herself. She also created a cute bird mobile (similar to this one) as well all the art, seat cushions and curtains using some of the same fabrics. 


Creating a beautiful space doesn't alway have to be expensive. With a little direction and a lot of DIY-ing, my friend created a precious nursery that didn't break the bank! 

Looking for a little direction for a room in your home? I would love to help! Just take a look at my services and then shoot me an email to get started!  

Thursday, February 28, 2013

Restaurant Passport 2013


There are so many great restaurants here in Stellenbosch- so much so that when it comes to pick a place for lunch or dinner it can be a little overwhelming.  For Valentine’s Day, I made us a Restaurant Passport (like this one)- a list of 44 restaurants in and around Stellenbosch that we want to try out this year before we head home. Some fancy fine dining restaurants for special occasions and then some easy going type places for a quick bite to eat after work.


On each page, I listed the name of the restaurant, the address, hours of operation, and then a few little symbols and other information that I thought might make our decision a little easier.


We have visited two of the restaurants so far. We put a little sticker in the box with the date that we visited and then jot down a few notes on the back of the card on how our meal was and if we would go back again. 

(this was before I found the stickers)
This handy little passport will cut out the "you choose" "no you choose" conversations when we are trying to decide what's for dinner that night. And we are keeping it in the car so when we are out and about, we can quickly make a decision!

Sunday, December 9, 2012

{Handmade Gifts} Aromatherapy Eye Pillow

Hi Everyone!! Today I have teamed up with a great group of ladies to create handmade gifts with something for all ages! If you need an idea for a few more gifts under the tree, check out these sweet handmade ideas from the ladies listed below!

Photobucket


These past few months have been a little stressful for my mom. Some changes at home and at work have given her a few rough days here and there. I figured what could be a better Christmas gift than some relaxation. An aromatherapy eye pillow is an easy gift to make that will pair well with a glass of wine to help her relax after a long day.

Eye pillows are filled with flax seeds and a few drops of lavender oil and are supposed to help headaches and work as an antidepressant. The pillow has the perfect weight to put enough pressure on your face to contour to it, blocking out the light.


To create the pillow, I used:
      -  Two 9" x 3" pieces of fabric scraps
      -  Sewing Machine and Thread
      -  Scissors
      -  Flax Seeds
      -  Lavender Oil

First, I sewed the two scraps of fabric together (pretty sides facing each other) on three sides, leaving one of the small sides open. And then turned the pillow right side out.

Next I mixed the flax seed and lavender oil. I straight guessed on amounts here. I filled the bowl with flax seed and then sprinkled the lavender oil until it smelled good. (Sorry I can't be more specific than that!!)

I then stirred and spooned the flax seeds into the pillow and sewed the last end closed. It may not be the prettiest gift under the tree but it sure does smell good!

Handmade gifts are my favorite to give and to receive!! Does anyone have some great handmade gift ideas?

Friday, December 7, 2012

DIY Art Inspired by Lulie Wallace


Over the past couple of years, I have started a collection of canvases with every intention of making a beautiful piece of art for our home. I started one project over two years ago that involved six square canvases but half way through, changed my mind on the direction I wanted to go with art. So, in the meantime, I have six lonely white canvases that have been hanging out in my junk room.


I have pinned so many beautiful art pieces and Lulie Wallace's gorgeous flower arrangement paintings kept standing out to me. I decided to try my hand at a painting inspired by her work. 

What I love so much about Lulie Wallace's paintings is they look so effortless. They have a "sketch-like" feel to the painting that I thought would be simple to try and imitate. I fell in to the paint-inside-the lines-perfectly-trap and my painting started to look more like "paint by numbers" rather than the sketch-like I loved. This project definitely made me appreciate  the talent it takes to create a beautiful work of art.

I went back over with metallic gold, silver and green paints to help give a more sketchy feel. I think it helped a little bit in that department but I also love how the light bounces off all those metallic accents. I love the art work I created but one day maybe I can own a real Lulie Wallace painting.


Has anyone ever dabbled in creating you own work of art? After this, I have realized my dreams of a large abstract DIY painting maybe be harder than I originally thought!

Monday, December 3, 2012

Confetti Painted Vases

I am trying to use most of what I already have for Christmas decor this year. It just doesn't make sense to go out and buy all new but, then again, I like to change it up just a bit! Last year I used lots of silvers, golds and a few rustic elements and I plan on doing the same this year. For a simple holiday craft, I created confetti painted vases using craft paint and plain clear vases I already had at home.

I pinned a colorful version of these vases a while back and knew that a simple metallic version would mix in great with my holiday decor.

I started with these clear Libby vases that I had left over from our wedding.(I used this trick to get out all the melted candle wax!) I had planned on confetti-ing all 7 vases that I had on hand, then decided maybe 5 would look better, then I started working and realized how much time each one took and decided 3 would be great!

I used two colors of gold and one champagne craft paint. To create the dots, I dipped the wooden end of a paint brush in to the paint and then dotted the vase. The more paint on the end of the brush creates a larger dot.


I started with the darkest color, then added the middle shade, and then the lightest color on top.  In between colors, I used a hair dryer to quickly dry the dots. Also, if some of the dots got too thick, I dried them just enough before spinning the vase to keep the dot from running.

The directions then say to place in a cold oven, preheat to 350 degrees, bake for 30 minutes and then turn off the oven and cool completely while the glasses are still in.  I kind of skipped this step but I'm sure I'll get around to it eventually!!

My plan for the mantel was to cluster many metallic candles together but I am running a few short since I only decided to create three confetti vases. I have a little tweaking to do to the mantel but I'll come up with something!

These are pretty with a little candle in them but will also look great with flowers for non-christmas-y occasions!

I can't believe it is Christmas time already! It seems like this year has flown by- but I'm taking in every little moment this last month here at home!

I'm linking up with Hi Sugarplum on Tuesday and also The Nester for the Best Christmas DIY and Crafts Ever Party! Come check out all the great crafts!!

Tuesday, November 27, 2012

Chevron Painted Kitchen Mat

This project has been on my to-do list for a long time! I spotted this Ziggy Mat in the June/July issue of HGTV Magazine but I couldn't dish out $40 on a kitchen mat. I decided to take the not-so-cute foam kitchen mat that I already had and paint it to look like the Ziggy.

I planned for this project to be one of my first in my 31 Days Project and then tried to hurry and finish in time for the latest Pinterest Challenge- which neither happened in time. Now, it has sat finished for a couple of weeks before I got around to blogging about it!

To start, I took the kitchen mat we already had and added a layer of primer.


By looking at my inspiration and guestimating how wide each stripe was, I marked each line and then taped off every other one.

I then marked off each of the diagonal lines every three inches or so.

I used craft acrylic paints from Hobby Lobby in many colors. I started to match the colors to that of the original mat but ended up choosing some that I liked more.

The tape kept my vertical lines crisp and straight, but to avoid the time of taping off every other diagonal section, I free-handed those edges.


After peeling up the tape, I connected the diagonal lines to create the chevron pattern.

I taped off the edges again and then started painting the second set of stripes. I had a few touch ups to make at the end but overall the Frog Tape worked well! To finish, I added a couple of thin coats of wipe-on poly. This just protects the craft paint from any spill or dirt that may get on the mat. I have had a few spills and drips to clean up and I am happy to report they wiped off easily with a damp paper towel!


This mat adds a great pop of color to my otherwise tan kitchen! I absolutely love it!! It took quite a bit of time but I'm so glad I did it! Using the mat and paints I already had at home, I would say this mat is a steal of a deal compared to the $40 competitor!!

Wednesday, October 24, 2012

{31 Days} Chalkboard Wine Glasses

Note:  Due to some unforeseen family illnesses, I am having to play catch-up on my 31 days challenge! Thank you for reading!

Day 13: Chalkboard Wine Glasses

Speaking of chalkboard, while I was working on my chalkboard coffee mugs, I decided to finally get around to another DIY pin of mine- chalkboard wine glasses!

When David and I registered for our wedding, we must have planned on having large dinner parties with lots of wine. We registered for two of the box sets of not expensive but still good wine glasses.  I decided to dress up our "extra" set with the chalkboard paint! I first tried the dip method but ran in to problems when I turned them upside down to dry. The paint was very thick and even after tapping and twisting, the excess paint ran down the stem of the glass. I was able to clean them up and decided that I would just sponge brush on a couple of thin layers of paint to eliminate this problem. I set the glasses upside down to dry.

I let the paint dry for a full 24 hours and then tested them out. The glasses are great but it seems my chalk might be a little tough to write with!!

I can't wait to have our next dinner party and use our new glasses! I just need to find a good piece of chalk!

13 down! 18 to go!!

{31 Days} Chalkboard Coffee Mugs

Note:  Due to some unforeseen family illnesses, I am having to play catch-up on my 31 days challenge! Thank you for reading!

Day 12: Chalkboard Coffee Mugs


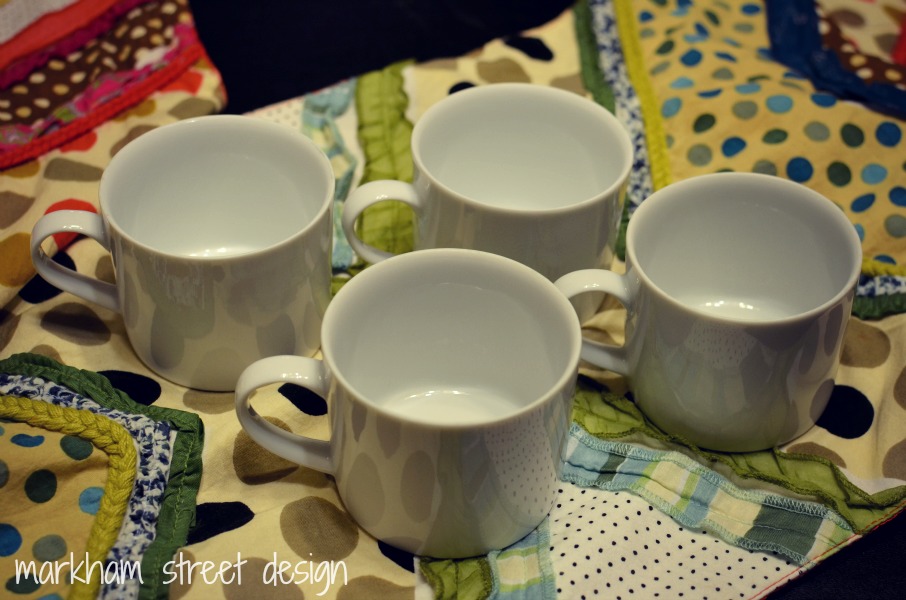
These chalkboard mugs have been a favorite pin of mine for a while. Earlier this year one of the local thrift stores had a moving sale and I stocked up on a few white coffee mugs (some that I used for this project) for only 10 cents each- including these four Crate and Barrel coffee mugs that looked so similar to my inspiration mugs!

I cheated a little bit for my chalkboard mugs. I didn't want to take a trip to the store for the "porcelain" chalkboard paint. I had a can of chalkboard paint made for furniture and walls- so that is what I used. I taped off the top half of the mugs and brushed on three coats of the chalkboard paint on the bottom half.

After I removed the tape, I let the chalkboard paint dry a full 24 hours before writing on the mugs. Because I did not use the porcelain paint, I did not bake the mugs. I didn't know what might happen so I decided it was best to just not do it!
I plan to use these mugs occasionally and only hand wash them. I hope they hold up well. So far so good!!

12 down! 19 to go!!

Monday, October 22, 2012

{31 Days} Glitter Pumpkins and Fall Mantel

Note:  Due to some unforeseen family illnesses, I am having to play catch-up on my 31 days challenge! Thank you for reading!

Day 11: Glitter Pumpkins and Fall Mantel

I love fall! We are still feeling some summer heat but we're getting there. To help give Texas a hint, I did a little fall decorating here in our home.

 I decided this year to use brighter and cooler colors than the typical warm fall colors. I created a yarn wrapped leaf wreath, painted a chevron pumpkin and added a little bling with colorful glitter pumpkins.

These pumpkins are easy! I started by sponge brushing on some modge podge on the top of the pumpkin, leaving the stem clean.

Then I sprinkled on some glitter out of my stash from my sorority days.

I love the color and sparkle that these pumpkins add to our bright fall mantel.


11 down! 20 to go!!
Related Posts Plugin for WordPress, Blogger...
09 10 11 12
Blogging tips